Newsletter Subscribe
Enter your email address below and subscribe to our newsletter
Enter your email address below and subscribe to our newsletter
You have finally done it. You spent three weekends scanning dusty photo albums, battling the flatbed scanner that sounds like a dying robot, and sneezing your way through the 1970s. You are a digital archivist hero.
But then, you look up from your computer and see The Stuff.
You know what I mean. The chunky costume jewelry your aunt wore to every bingo night. The handmade quilt that is currently folded into a shape-defying geometry. The clay sculpture your son made in third grade that looks vaguely like a duck, or possibly a very lumpy potato.
You can’t smash a ceramic duck into a flatbed scanner. (Well, you can, but it voids the warranty and makes a terrible noise). So, what do you do? Do you just hope the moths and gravity are kind to these treasures?
Here is the good news: You don’t need a museum curation degree or a camera that costs more than your first car. You likely have a powerful archival tool right in your pocket. Today, we are going to look at how to turn your smartphone into a preservation machine for all the things that refuse to lie flat.
When people try to photograph heirlooms, they usually make one fatal mistake: The Flash.
Using your phone’s flash on a shiny object—like a silver locket or a glazed vase—is a disaster. It creates a harsh, blinding white spot that makes the object look like it’s being interrogated by the police.
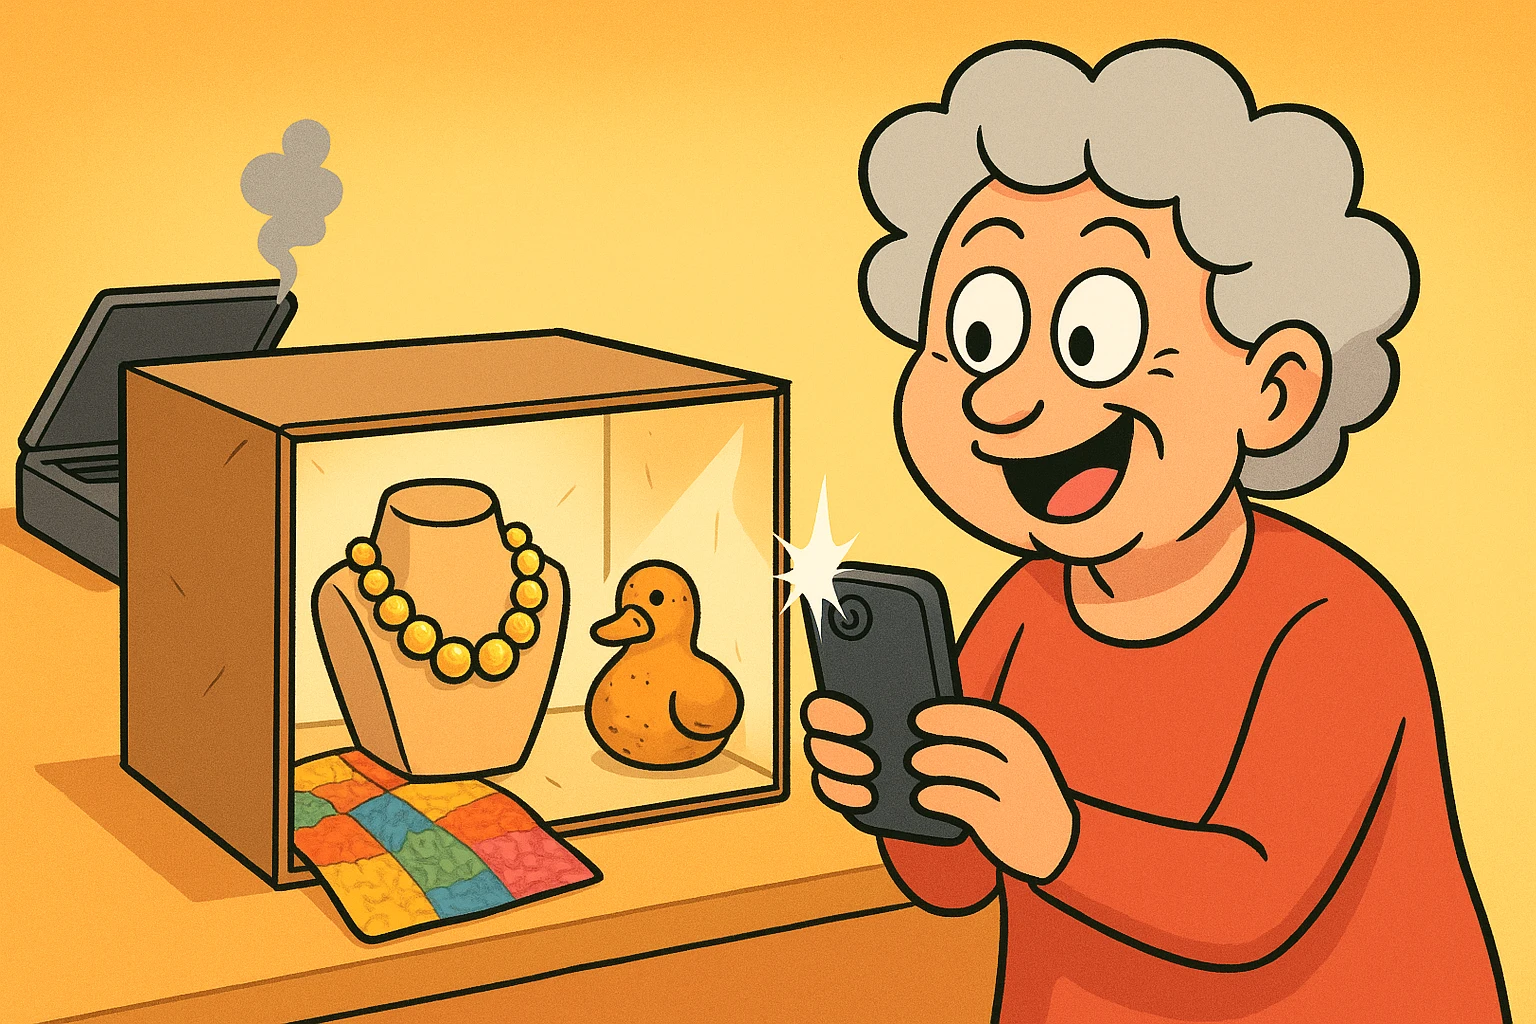
To get that soft, museum-quality look, you need diffused light. And the best way to get it is with a high-tech piece of equipment called “a cardboard box with the sides cut out.”
Place your heirloom inside. Shine a regular desk lamp through the tissue paper on the side. Suddenly, you have soft, beautiful light wrapping around your object. No glare, no harsh shadows, just professional-looking history.
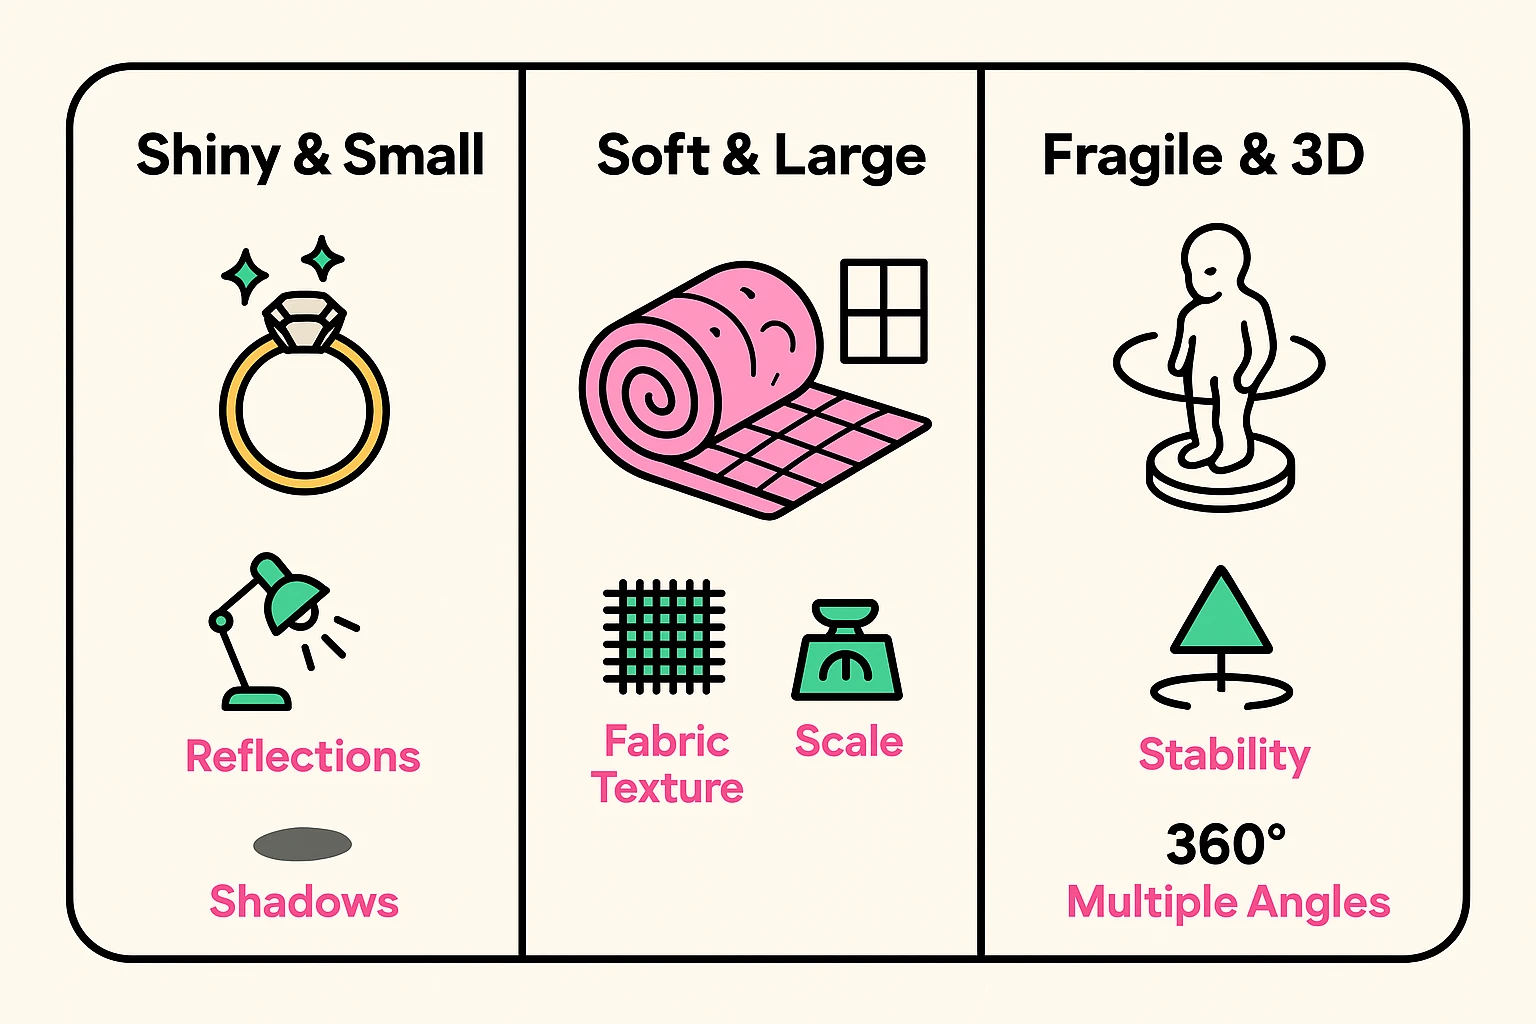
Not all heirlooms are created equal. A quilt behaves very differently than a pocket watch. Here is how to handle the three most common categories of “stuff.”
Jewelry is the diva of the photography world. It reflects everything, including your face holding the phone.
Textiles are tricky because they have texture. If you use a flash, you flatten the texture. If you don’t use enough light, they look muddy.
Here is where we get a little futuristic. Sometimes a single photo doesn’t capture the essence of a thing. If you have a statue, you want to see the back, the sides, and the bottom.
You can actually try Photogrammetry. Don’t let the word scare you; it just means “using photos to measure stuff.” Apps like Polycam allow you to walk around an object with your phone, snapping pictures as you go. The app then stitches them together into a 3D model that you can spin around on your screen. It feels like magic, and it preserves the object in a way a flat photo never could.
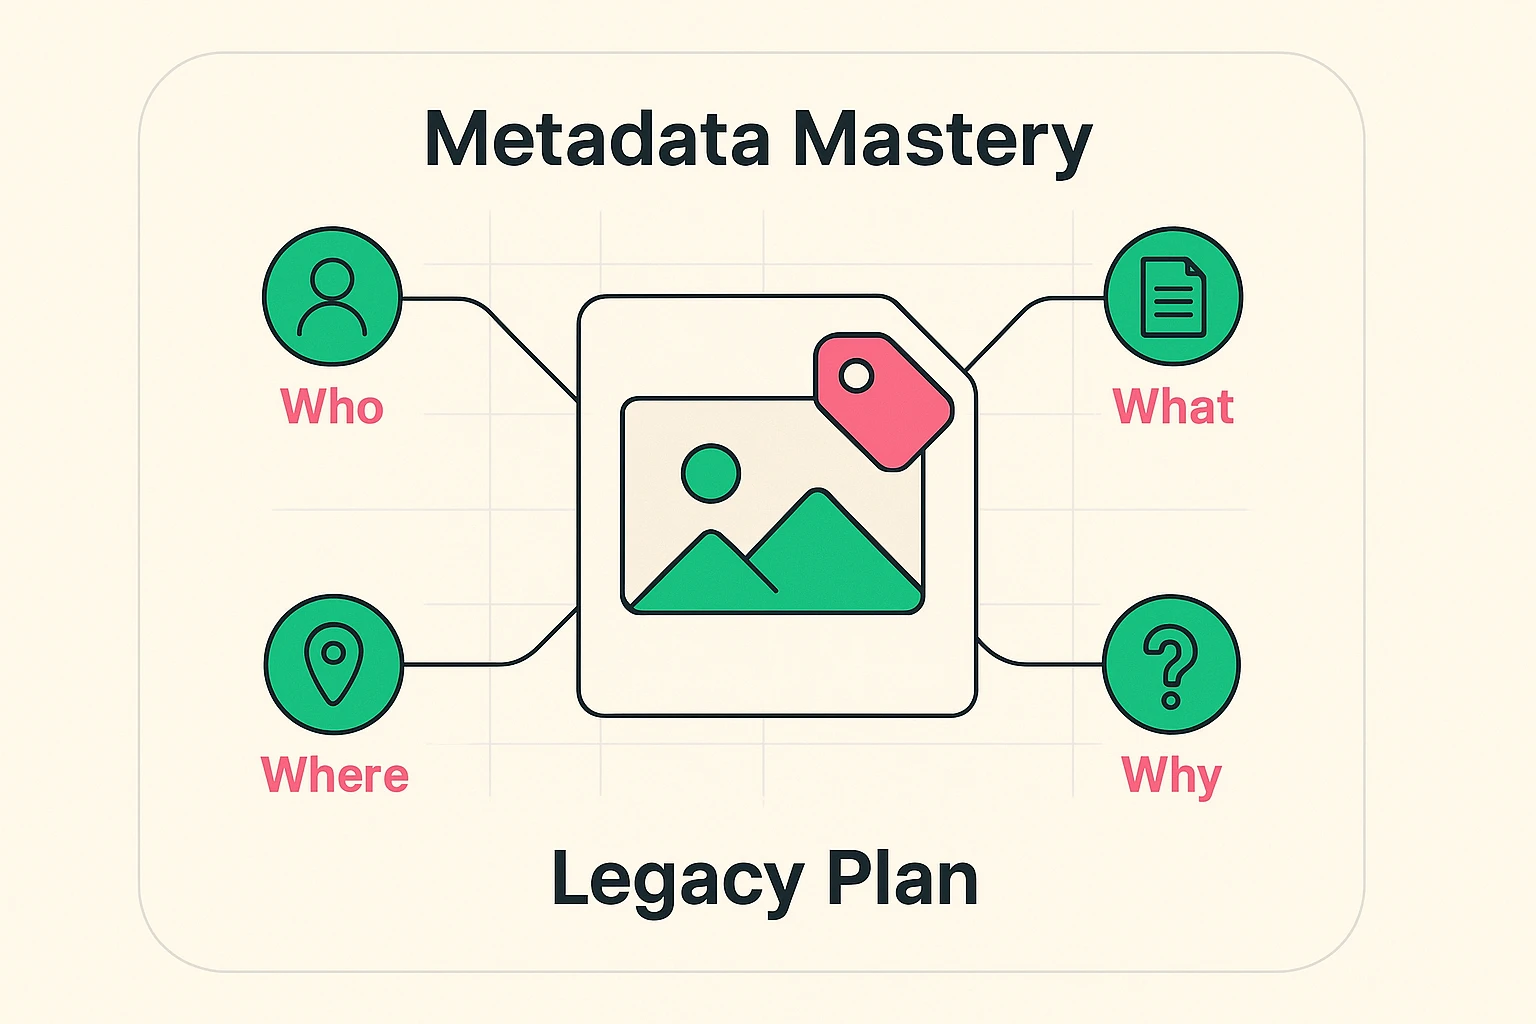
Imagine this: It is the year 2075. Your great-granddaughter finds a digital file named IMG_8842.jpg. She opens it. It is a picture of a tarnished silver spoon. She shrugs and deletes it.
Tragedy! That wasn’t just a spoon; that was the spoon your grandmother used to stir her famous “combustion engine chili” that won the county fair in 1952.
A photo without a story is just clutter. You need to attach Metadata.
Think of it as writing on the back of a physical photo, but digital. It stays stuck to the file forever.
You don’t need fancy software.
By doing this, you are creating a searchable family archive. Your descendants can literally search their computer for “Grandma’s Chili Spoon” and find it.
It helps, but you don’t need a professional one. You can buy a cheap mini-tripod for your phone for under $15. Or, use the “T-Rex method”: tuck your elbows tight into your ribs, breathe out, and tap the shutter gently.
That is a personal choice (and a brave one). Many professional organizers suggest that if an item is kept solely for the memory, a high-quality photo often satisfies the emotional need, allowing you to let the physical object go. But maybe keep the diamonds.
Follow the 3-2-1 rule. Three copies of the data, on two different types of media (like your computer and an external hard drive), with one copy off-site (like a cloud"The cloud" refers to storage and services that are accessed over the internet instead of being stor... More service).
It is easy to look at a box of old trinkets and feel overwhelmed. It feels like a mountain of work. But remember, you don’t have to do it all in a day.
Start with one object. Maybe it’s that weird clock, or dad’s bowling trophy. Set up your cardboard box, turn on a lamp, and take the shot. Write the story.
You aren’t just taking a picture of a thing. You are building a bridge between the past and the future. And you’re doing it without breaking your scanner. That is a win-win.