Newsletter Subscribe
Enter your email address below and subscribe to our newsletter

There are few modern-day panics quite like it. You plug in your phone, tablet, or laptop, expecting that cheerful little bing of recognition, but instead, you get… silence. Nothing.
The screen remains stubbornly, mockingly black. Your digital lifeline to the world is fading, and the charger seems to be on a coffee break.
Your first thought might be to rush to the store, waving your device around and declaring it a high-tech paperweight. But hold on!
More often than not, the problem isn’t some catastrophic internal failure that requires a team of engineers. It’s usually something much simpler.
Before you start planning a gadget funeral, let’s play detective. We’re going to follow a few clues to figure out if the culprit is your device, its charger, or the wall outlet that’s been quietly minding its own business until now.
Think of charging your device like watering a plant.
You need a water source (the wall outlet), a hose (the charging cable and its power brick), and the plant itself (your device).
If the plant is wilting, the problem could be a dry faucet, a kink in the hose, or something wrong with the plant.
Electricity works the same way. We call this the “power chain,” and it has three main parts:
If any link in this chain is broken, your device won’t get the juice it needs. Our mission is to find that broken link.
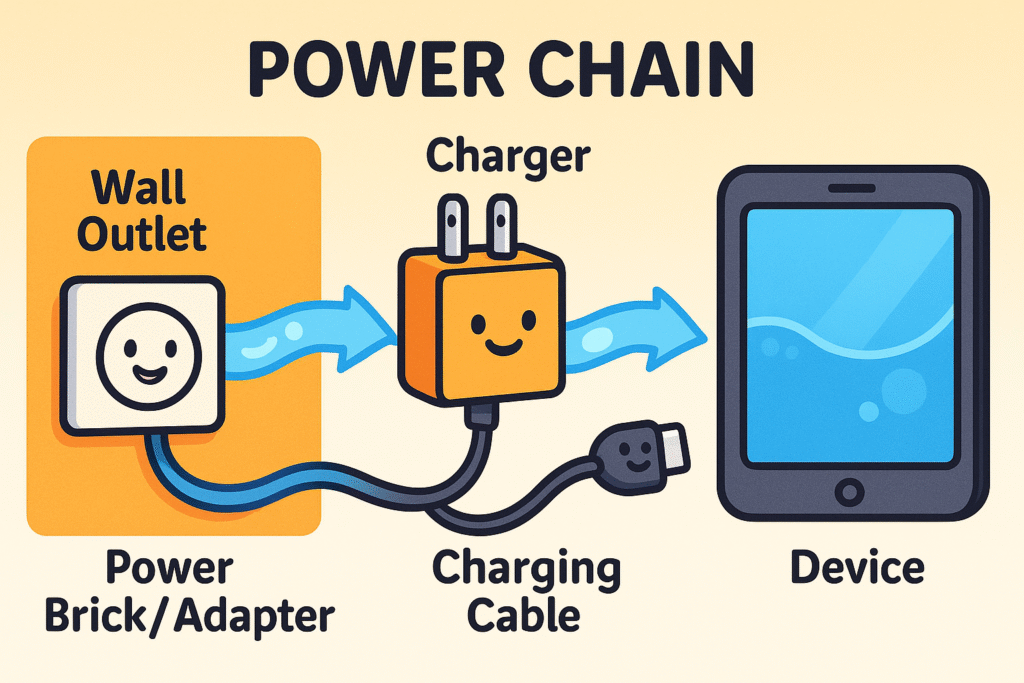
This illustration shows how power travels from the outlet, through the charger, into your device — understanding this ‘power chain’ helps you identify where charging problems might happen.
Ready to put on your detective hat? We’ll start with the easiest and most common suspects and work our way down the list. There’s no need for fancy tools, just a bit of observation and another household item you definitely have nearby.
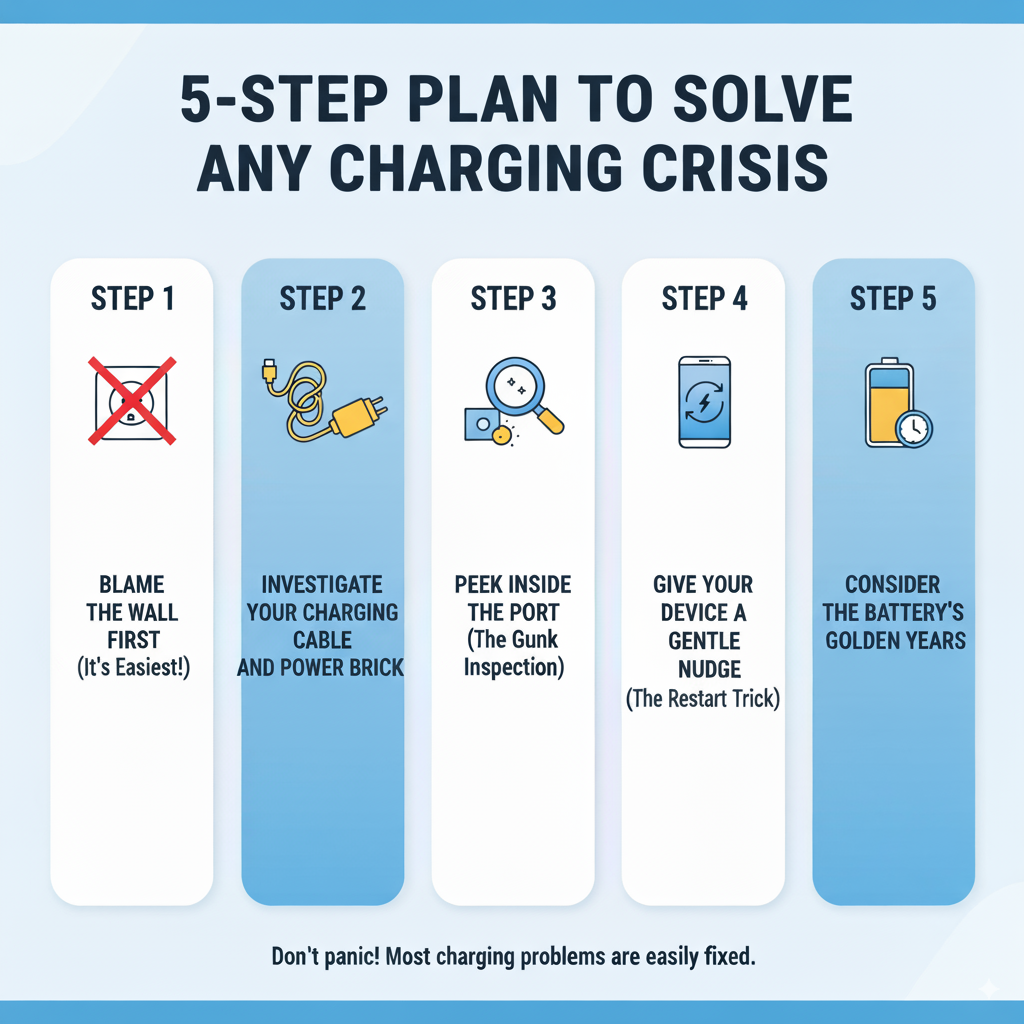
Follow these five simple steps in order to find out if your device’s charging problem comes from the outlet, charger, port, or battery — safe, easy, and designed just for you.
Before you assume your expensive gadget has given up the ghost, let’s check the source. An outlet can go on strike for a few reasons, and it’s the simplest thing to rule out.
How to Test It: Unplug your device charger and plug in something you know works, like a lamp or a small radio.
What to Do: If resetting a safety outlet or flipping a breaker in your home’s main electrical panel doesn’t fix it, it’s time to stop. Safety First: Never try to fix an outlet yourself. That’s a job for a licensed electrician.
The charging cable leads a hard life. It gets bent, twisted, stepped on, and occasionally used as a chew toy by the family pet. This wear and tear can break the tiny wires inside, even if you can’t see the damage.
How to Inspect It:
If you have another charging cable and brick handy, try using that one. If your device starts charging, you’ve officially solved the case. The original charger is faulty and needs to be replaced.
The small charging port on your phone or tablet is a magnet for dust, crumbs, and that mysterious lint that seems to breed in our pockets and bags. Over time, enough gunk can build up to prevent the charger from making a solid connection.
How to Clean It Safely:
Once you’ve evicted the lint bunnies, try plugging your device in again. A clean port can often make all the difference.
Sometimes, the problem isn’t with the hardware at all. The software—the brain of your device—can get confused and might not recognize that a charger is connected. Think of it like a computer freezing up.
How to Do It: A simple restart is often the cure. Press and hold the power button until the option to “Power Off” or “Restart” appears. Choose “Restart.” If that doesn’t work, turn it off completely, let it sit for a minute, and then turn it back on. This electronic “nap” can often clear up minor glitches.
If you’ve tried everything above and are still getting nothing, it might be time to consider the battery itself. Like all of us, batteries age. After a few years of faithful service, they just can’t hold a charge the way they used to.
Signs of a Failing Battery:
If you suspect the battery is the issue, that’s usually a job for a professional repair shop. They can safely replace it and give your device a new lease on life.
Feeling a little overwhelmed? Don’t be. Just remember these simple visual cues to quickly identify the source of your charging woes.
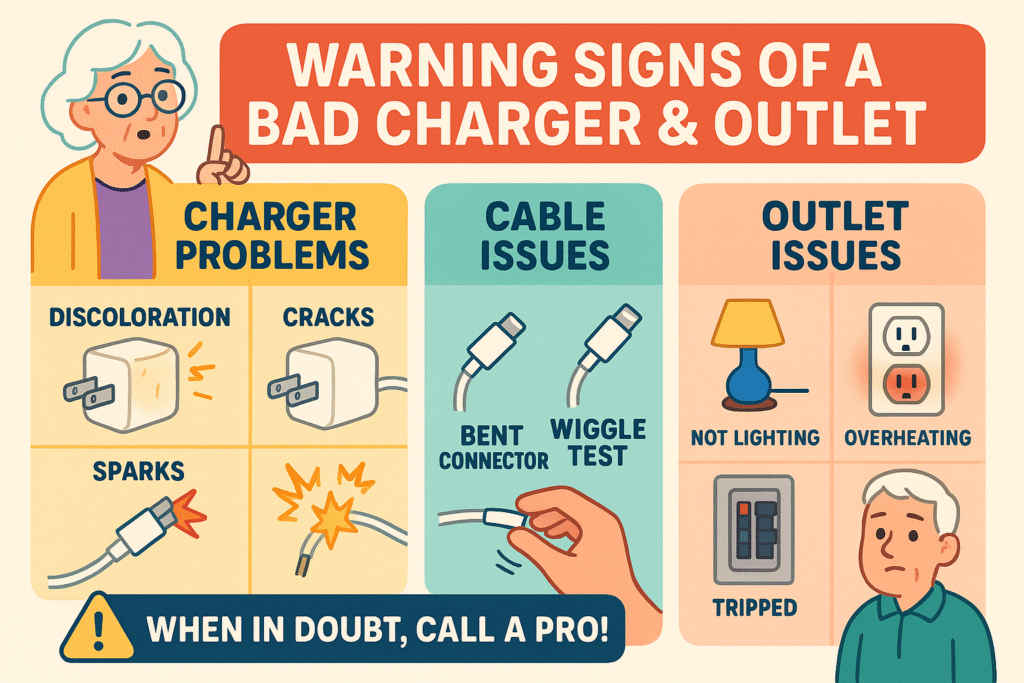
Remember these clear signs of power supply trouble — spotting a bad charger, cable, or outlet early can save you time, frustration, and keep you safe.
It’s always best to use the charger that came with your device or one from a reputable brand. A cheap, poorly made charger might not provide the correct amount of power and could even damage your device’s battery over time.
It’s normal for the power brick to feel slightly warm to the touch when it’s working. However, if it ever feels alarmingly hot—too hot to comfortably hold—unplug it immediately. That’s a sign that it’s faulty and a potential safety hazard.
Those are called GFCI (Ground Fault Circuit Interrupter) outlets. They are a safety feature designed to shut off power instantly if they detect a problem, preventing electrical shocks. If one isn’t working, the “RESET” button may have popped out. Try pressing it back in firmly.
Modern smartphones are smart! They have technology that stops the charging process once the battery is full. So while it’s not a major issue, most experts agree that keeping your battery between 20% and 80% is ideal for its long-term health.
By following these steps, you’ve gone from a moment of panic to a point of power. You now have a good idea of what’s causing the problem and can take the right action, saving you a potentially unnecessary and expensive trip to a repair shop.
See? You don’t need to be a tech genius to solve these common problems. With a little patience and a bit of detective work, you can get your digital world powered up and running again in no time.