Newsletter Subscribe
Enter your email address below and subscribe to our newsletter


Picture this: You’re out and about, maybe enjoying a nice day at the park, when suddenly you get that dreaded text message from your mobile provider—”You’ve used 90% of your data for this billing cycle.”
Now, you’re stuck wondering whether to put your phone on airplane mode for the rest of the month or pay through the nose for extra data.
Sound familiar? It’s a scenario many of us have faced, especially if you’ve got a data plan that’s tighter than a pair of jeans fresh out of the dryer.
But fear not! With Android’s Data Saver feature, you can avoid this situation entirely and keep your data usage in check.
Let’s dive into what Data Saver is, why it’s so handy, and how you can set it up on your AndroidAndroid is a type of operating system—like the brain of a device—that runs on many smartphones a... More device.
In a nutshell, Android Data Saver is like a gatekeeper for your mobile data. It keeps a close eye on how much data your apps are guzzling down, especially when you’re not paying attention.
You might think you’re safe because you’re not actively using apps, but sneaky background processes can still eat up your data like there’s no tomorrow.
Data Saver steps in to make sure that apps only use mobile data when they absolutely have to—like when you’re not connected to Wi-FiWi-Fi, short for Wireless Fidelity, revolutionizes connectivity by enabling devices to access the in... More.
It’s available on devices running Android 7.0 or later, so as long as you’re not rocking a flip phone, you’re good to go!

The most obvious benefit of Data Saver is that it helps you avoid hitting your data limit and racking up extra charges. But that’s not all!
It’s also a lifesaver when you’re traveling or in situations where Wi-Fi is about as reliable as a paper umbrella in a rainstorm.
With Data Saver turned on, apps will behave themselves and only use data when it’s really necessary, like when you’re watching a cat video on YouTube that simply can’t wait.
And if you’re nearing the end of your billing cycle and want to stretch your data, Data Saver is your new best friend.
Now, before you go flipping on Data Saver and high-fiving yourself, there are a few things to keep in mind.
First off, Data Saver doesn’t completely shut off all data usage—some apps and services may still sneak through, especially if they’re crucial to your phone’s operation.
For example, things like GoogleGoogle is a multinational technology company known for its internet-related products and services, i... More Play or your alarm clock need to function properly, so they might still use a bit of data in the background.
Also, while Data Saver is great for keeping your data in check, you’ll want to remember to turn it off when you’re back on Wi-Fi, so your apps can resume normal operations without hiccups.
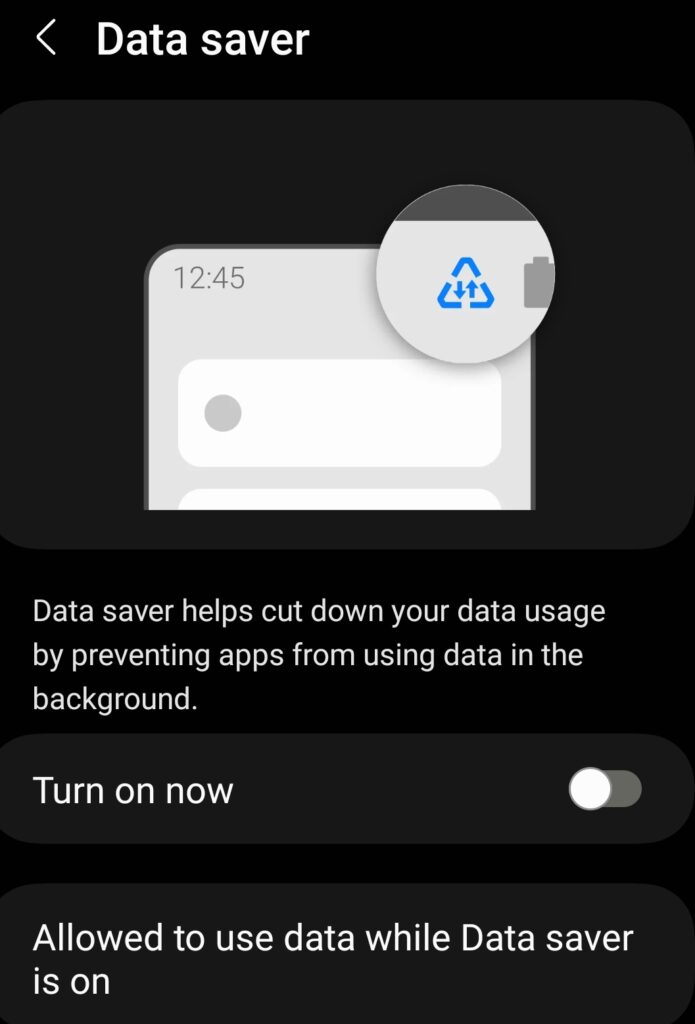
Setting up Data Saver is as easy as pie. Here’s how to do it:

Voilà! You’re all set. When Data Saver is on, you’ll see a small iconAn icon is a small graphical symbol used to represent an object, action, or concept in a digital int... More in the status bar, and you might get a notification reminding you that it’s active.
If you have any apps that absolutely need to run in the background, you can allow them to bypass Data Saver by following the steps below.
Turning off Data Saver is as simple as turning it on. Follow the steps above, but toggle the “Turn on now” button to turn it off.
Easy, right? And just like that, your apps are back to using data like normal.
Want to make Data Saver work just the way you like it? You can customize it by allowing certain apps to use unrestricted data, even when Data Saver is on.
Here’s how:
This is super handy for things like messaging apps or email, where you don’t want to miss anything important just because Data Saver is on.
Using Data Saver is like wearing suspenders with your belt – it’s all about keeping things under control. With these tips, you’ll be navigating the digital seas like a pro, without fear of data overages walking the plank of your bank account.
So go forth and surf the web with confidence. (Just remember to turn off Data Saver when you get home, or you might be wondering why your cat videos are taking longer to load than it takes to knit a sweater.)
Happy surfing!